Snorby in CentOS 6.5

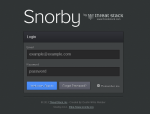
snorby_newHi, this is me again. This time I’m offering an update of my old post about how to install Snorby on CentOS as some readers have found some errors and problems. Though I’ve created this post for CentOS 6.5, this article may help you also if you’re trying to install Snorby on CentOS 6.4.

Now it’s easier to use wkhtmltopdf and I’ve also added a section to make the installation of ruby cleaner. Ok let’s start!

First, we’re installing some packages and we’re also going to install the EPEL repository.

yum install http://dl.fedoraproject.org/pub/epel/6/x86_64/epel-release-6-8.noarch.rpm
yum groupinstall "Development Tools"
yum install openssl-devel readline-devel libxml2-devel libxslt-devel mysql mysql-devel mysql-libs mysql-server urw-fonts libX11-devel libXext-devel fontconfig-devel libXrender-devel unzip wget xorg-x11-server-Xvfb libyaml libyaml-devel gdbm-devel tcl-devel db4-devel libffi-devel 

Now we are going to download and compile ImageMagick.

cd /opt
wget http://ftp.sunet.se/pub/multimedia/graphics/ImageMagick/ImageMagick.tar.gz
tar xvfz ImageMagick.tar.gz
cd ImageMagick-*
./configure
make
make install
ldconfig /usr/local/lib

OK, time for wkhtmltopdf. In the past I had problems with the static version, that’s why I decided to compile it. The latest version works fine for me. Visit http://wkhtmltopdf.org/ and download the latest wkhtmltopdf for your Linux architecture 32 bits or 64 bits. I’m using the 64 bits version.

cd /opt
wget https://github.com/wkhtmltopdf/wkhtmltopdf/releases/download/0.12.0/wkhtmltox-linux-amd64_0.12.0-03c001d.tar.xz
tar xvf wkhtmltox-linux-amd64_0.12.0-03c001d.tar.xz
ln -s /opt/wkhtmltox/lib/libwkhtmltox.so.0 /usr/local/lib64/libwkhtmltox.so.0
ln -s /opt/wkhtmltox/bin/wkhtmltopdf /usr/local/bin/wkhtmltopdf
ldconfig /usr/local/lib64

Thanks to this article I’ve used the instructions to create the rpm package for Ruby 1.9.3

cd /root
mkdir -p rpmbuild/{BUILD,BUILDROOT,RPMS,SOURCES,SPECS,SRPMS}
wget ftp://ftp.ruby-lang.org/pub/ruby/1.9/ruby-1.9.3-p484.tar.gz -P rpmbuild/SOURCES
wget https://raw.github.com/imeyer/ruby-1.9.3-rpm/master/ruby19.spec -P rpmbuild/SPECS
rpmbuild -bb rpmbuild/SPECS/ruby19.spec
yum localinstall /root/rpmbuild/RPMS/x86_64/ruby-1.9.3p484-1.el6.x86_64.rpm

Now we’re going to install bundler and Snorby

cd /opt
gem install bundler
wget -O snorby.zip --no-check-certificate https://github.com/Snorby/snorby/archive/master.zip
unzip snorby.zip
cd snorby-master

I’ve created an empty database for Snorby and I’ve configured a user with permissions for that database:

# mysql -u root -p 
Enter password: 
mysql> create database snorby; 
Query OK, 1 row affected (0.14 sec) 
mysql> grant all privileges on snorby.* to snorby@localhost identified by 'snorby'; 
Query OK, 0 rows affected (0.06 sec) 
exit

We’ve to create a database.yml config file and edit it. We’ll add the database password, the name of the database and the MySQL server hostname or IP address:

cp config/database.yml.example config/database.yml

//This is the content of my file
snorby: &snorby 
 adapter: mysql 
 username: snorby 
 password: "snorby" 
 host: localhost

OK, I hope you’re following and you’ve no errors so far. Edit the Gemfile file and follow these instructions:

Change: gem 'rake', '0.9.2' to gem 'rake', '> 0.9.2' 
Add: gem 'thin' after gem 'json' so it shows like this:
gem 'json', '~> 1.7' 
gem 'thin' 
Comment the gem 'thin' line inside the group(:development) using a #. The files will look like this:

group(:development) do 
        gem "letter_opener" 
#  gem 'thin' 
end 

Add: gem 'orm_adapter' after gem 'netaddr' so it shows like this:
gem 'netaddr','~> 1.5.0' 
gem 'orm_adapter'

We’re close. Edit the Gemfile.lock file.

Change the line rake (0.9.2) to rake (0.9.2.2)

We need a snorby_config.yml. Then you can edit thing like the domain for your Snorby installation. You have more information about configuration in Snorby’s official page.

cp config/snorby_config.yml.example config/snorby_config.yml

Let’s install Snorby. If installation is successful we’ll launch it using the thin server (thanks for the tip Mephux and of course thank you for Snorby)

bundle install
rake snorby:setup
rails server thin -e production

If everything is fine you’ll have Snorby listening on 0.0.0.0:3000, if you want to open the port use this iptables rule (adjust it for your needs of course 🙂 )

iptables -I INPUT -p tcp --dport 3000 -m state --state=NEW,ESTABLISHED,RELATED -j ACCEPT

And that’s it! Snorby is showing the login (user: snorby@snorby.org password: snorby) and the export to PDF function is working for me. I’ll try to offer more information about Snorby in the future.

Thank you Parvez and W.White for your comments and please let me know if you find errors.

Cheers!

“Installing” Floodlight OpenFlow Controller – Debian Wheezy

projectfloodlight-logo-header

It’s time to learn new things. I want to use an OpenFlow controller with my OVS switches. Openvswitch already provides “a simple OpenFlow controller reference implementation” (ovs-controller) but I’d like to start with Floodlight. I’m using the official documentation but, as always, I like to share my notes with you:

Floodlight works with Java so we’ll install some packages:

aptitude -y install default-jdk ant git

Let’s download the latest Floodlight stable version and compile the jar:

cd /opt
git clone git://github.com/floodlight/floodlight.git
cd floodlight/
ant

...
dist:
[jar] Building jar: /opt/floodlight/target/floodlight.jar
[jar] Building jar: /opt/floodlight/target/floodlight-test.jar
BUILD SUCCESSFUL
Total time: 25 seconds

We’re going to start Floodlight. The controller by default will listen in the 6633 port.

java -jar target/floodlight.jar
19:53:53.434 INFO [n.f.c.m.FloodlightModuleLoader:main] Loading default modules
19:53:53.827 INFO [n.f.c.i.Controller:main] Controller role set to MASTER
19:53:53.834 INFO [n.f.c.i.Controller:main] Flush switches on reconnect -- Disabled
19:54:03.558 INFO [n.f.l.i.LinkDiscoveryManager:main] Setting autoportfast feature to OFF
19:54:03.779 INFO [o.s.s.i.c.FallbackCCProvider:main] Cluster not yet configured; using fallback local configuration
19:54:03.779 INFO [o.s.s.i.SyncManager:main] [32767] Updating sync configuration ClusterConfig [allNodes={32767=Node [hostname=localhost, port=6642, nodeId=32767, domainId=32767]}, authScheme=CHALLENGE_RESPONSE, keyStorePath=/etc/floodlight/auth_credentials.jceks, keyStorePassword is unset]
19:54:03.853 INFO [o.s.s.i.r.RPCService:main] Listening for internal floodlight RPC on localhost/127.0.0.1:6642
19:54:04.066 INFO [n.f.c.i.Controller:main] Listening for switch connections on 0.0.0.0/0.0.0.0:6633
19:54:09.047 INFO [n.f.j.JythonServer:debugserver-main] Starting DebugServer on :6655

OK, the controller is waiting for connections. Now we’re going to add a new OVS bridge and set the controller for that bridge:

ovs-vsctl add-br br0
ovs-vsctl set-controller br0 tcp:127.0.0.1:6633

Floodlight is being contacted by Openvswitch! 🙂

20:18:24.725 INFO [n.f.c.i.OFChannelHandler:New I/O server worker #2-1] New switch connection from /127.0.0.1:43418
20:18:24.749 INFO [n.f.c.i.OFChannelHandler:New I/O server worker #2-1] Disconnected switch [/127.0.0.1:43418 DPID[?]]
20:18:25.703 INFO [n.f.c.i.OFChannelHandler:New I/O server worker #2-2] New switch connection from /127.0.0.1:43419
20:18:25.728 INFO [n.f.c.i.OFChannelHandler:New I/O server worker #2-2] Switch OFSwitchBase [/127.0.0.1:43419 DPID[00:00:b6:19:eb:08:04:4d]] bound to class class net.floodlightcontroller.core.internal.OFSwitchImpl, writeThrottle=false, description Switch Desc - Vendor: Nicira, Inc. Model: Open vSwitch Make: None Version: 1.9.3 S/N: None
20:18:25.731 INFO [n.f.c.OFSwitchBase:New I/O server worker #2-2] Clearing all flows on switch OFSwitchBase [/127.0.0.1:43419 DPID[00:00:b6:19:eb:08:04:4d]]
20:18:25.734 WARN [n.f.c.i.C.s.notification:main] Switch 00:00:b6:19:eb:08:04:4d connected.

Now thanks to Marist College (SDN Lab) and IBM I’ll use Avior as a Floodlight GUI, visit the webpage to download the 32bit or 64bit version

cd /opt
wget http://openflow.marist.edu/static/download/avior-1.3_linux_x64.jar
java -jar avior-1.3_linux_x64.jar

And here is a screenshot, the OpenVswitch is shown. Great.

avior_screenshot_1

This is just the beginning! More in a few days… I’ll update this post including how to add a daemon to start the controller.

Openvswitch 1.9.3 LTS – Debian Wheezy

I’m preparing a lab with two nodes, one with Debian Wheezy and the other one with CentOS 6.5.

I’m not a Debian guy so I hope I’m not doing things wrong, but first of all I’d like to thank again Nicira Inc as I used the information included in the README.Debian included in Openvswitch’s recent versions.

Here are my notes on how I installed Openvswitch 1.9.3 LTS, but first a warning, you may find Openvswitch in the official Debian repositories or from Ubuntu repositories, so use this post if you really can’t find the deb packages on the Internet. I just want to help 🙂

  1. Let’s install some development packages. If you have any problems you can try to install the build-essential packages.
    aptitude -y install gcc make automake autoconf debhelper libssl-dev pkg-config python-all python-qt4 python-zopeinterface python-twisted-conch gdebi-core
  2. Now we’re going to create a user, and “use” it to prepare the debian packages. Be patient, we need to compile.
  3. useradd -s /bin/bash -m openvswitch
    su – openvswitch
    wget http://openvswitch.org/releases/openvswitch-1.9.3.tar.gz
    tar xvfz openvswitch-1.9.3.tar.gz
    mv openvswitch-1.9.3.tar.gz openvswitch_1.9.3.orig.tar.gz
    cd openvswitch-1.9.3/
    dpkg-buildpackage -us -uc
    exit
  4. Now as root we are going to install the Debian packages we’ve just created and generate the kernel module. Remember to accept the installations :-):
    gdebi /home/openvswitch/openvswitch-datapath-source_1.9.3-1_all.deb
    module-assistant auto-install openvswitch-datapath
    gdebi /home/openvswitch/openvswitch-common_1.9.3-1_amd64.deb 
    gdebi /home/openvswitch/openvswitch-switch_1.9.3-1_amd64.deb accept to install 
    
    [ ok ] Inserting openvswitch module. 
    [warn] /etc/openvswitch/conf.db does not exist ... (warning). 
    [ ok ] Creating empty database /etc/openvswitch/conf.db. 
    [ ok ] Starting ovsdb-server. 
    [ ok ] Configuring Open vSwitch system IDs. 
    [ ok ] Starting ovs-vswitchd. 
  5. And now let’s if openvswitch is ready:
    # ovs-vsctl -V 
    ovs-vsctl (Open vSwitch) 1.9.3 
    Compiled Feb 18 2014 19:20:41
    # ovs-vsctl show 
    859be08b-200c-40dc-9863-0323a655589b 
        ovs_version: "1.9.3"

And… finished, or at least that’s what it seems.

Thanks for reading, and please visit my personal page if you want to hire me… for free.

VMWare Certified Associate and free learning material

You may already know but VMWare has currently three associate level certifications (another one about Networking will be added soon):

Though there are no prerequisites for this certifications, VMWare offers you free online courses as learning material for these exams once you’ve registered as a user.

I’ve started to watch the VCA-DCV modules and they are really good! (maybe you can find your course in your language) and you’ll learn more about VMWare products and terminology. I’ll try to finish the online courses and if the exams are cheap maybe I’ll try to register and take the exams. This old blog post about the associate exams says that the’ll give me 50% off the exam… but maybe that discount has expired.

See ya!